Adding an image is a simple way to make your website more attractive.
For this exercise find any image you like, and put it into the same folder as the webpage. Rename your image to "myimage"
For this exercise find any image you like, and put it into the same folder as the webpage. Rename your image to "myimage"
We are now going to insert the image underneath our text.
Once again open up your HTML file in notepad so you can see the code.
This is what the code is going to look like:
Once again open up your HTML file in notepad so you can see the code.
This is what the code is going to look like:
<img src="myimage.gif"></a>
Notice that my image file is called "myimage.gif", your file may be "myimage.jpg" or "myimage.bmp" depending on how you saved your picture. To find out what type of picture it is right click on the picture and select "Properties".
Once inserted your code will look like this:
<html>
<head>
<head>
<title>My Own Home Page </title>
</head>
</head>
<body>
<body bgcolor= "blue">
<font color="Red">
<H1> I am Your-Name and this is my web Page!</H1>
<img src="myimage.gif"></a>
</font>
</body>
<body bgcolor= "blue">
<font color="Red">
<H1> I am Your-Name and this is my web Page!</H1>
<img src="myimage.gif"></a>
</font>
</body>
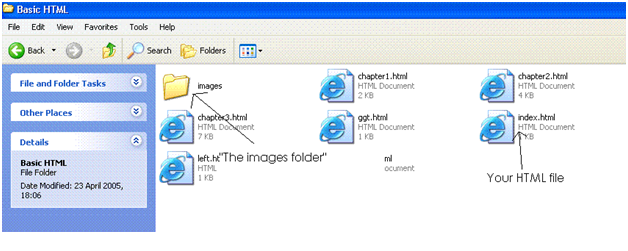
IMPORTANT TIPS: Most websites will store their images in a seperate folder called "images".
To show a picture from the images folder the code would look like this:
To show a picture from the images folder the code would look like this:
<img src="/images/myimage.gif"></a>
You could try this now by creating a folder called images in the folder where your HTML file is saved. Here is an illustration:


0 comments: